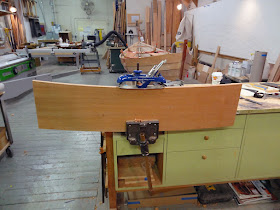
Well I've been working pretty hard to finish fitting the seats and side benches. My idea to laminate some curve into the bench stock worked out very well. I could have shimmed the benches up a little as Doryman suggested, but the curved stock fits the riser curvature for their full length, and the benches fair into the thwarts nicely, so I'm glad I put the time into it. I made a thin ply pattern for the benches, scribing to fit the hull and notching around the frames. There is quite a bevel on the edges of the side benches where they meet the hull, but the bevel doesn't change much, thankfully.
 |
| Thin, plywood patterns were made for the side benches. |
I fit the pieces carefully to the hull and around the frames, but left the inboard edges wild.
I next sprung a batten around the whole length of the bench, sawed out the curve…
…and cleaned up the cut with a compass plane.

After going to all the trouble to fit the benches tight to the hull, it was suggested by some of the folks on the WoodenBoat forum that I should leave a space, or cut scuppers at the hull to drain any loose water that would collect there in a puddle (think wet butt). I decided that was a smart move, and scribed a fat quarter of an inch off the outboard edges of the benches, but left the notches at the frames snug. I also made the fit a little loose where the benches butt the thwarts. I was afraid of future swelling across the grain of the thwarts, pushing against the frame-heads and possibly doing some damage. I cut a bevel on the undersides of all the parts to reduce their apparent thickness, and finished off the edges top and bottom with a hand-cut round over. I prefer cutting this by hand, rather than with a router. Its faster, quieter, and produces an elegant transition from square to radiused edge. The last piece to get out was the dagger trunk cap, which notches around the dagger opening, and butts into the forward thwart.
 |
| The benches were cut back a little, to drain water. |
|
 |
| The front edge is beveled on the underside to reduce the apparent thickness. The screws provide little stands to facilitate finishing both sides of the piece at once. |
|
All of the furniture was finish sanded, and the screw holes were bunged and trimmed. It doesn't seem that complicated, but there were 23 separate pieces of wood to cut, fit, shape, plug, sand, or otherwise caress and cajole into the boat. All for a place to sit! And after all of that, those pieces still have to be varnished, several coats.
 |
| This little sander is ideal for working in tight places. |
 |
| The middle thwart alone has 8 separate pieces! |
I put a sealer coat of amber shellac on everything, to give it a little color.
 |
| The furniture, with sealer. |
The Spanish Cedar I used is quite pretty, though not as dark or as red as mahogany or sapele would be. But it is quite light in weight, which is good because there is a lot of it. It's pretty soft, though, and if it gets dinged up too badly, or I get tired of varnishing every year (more likely), I can always paint it! But for now its varnish time. I like Z-Spar 1015 Captain's Varnish, and have used it for years. I thin the first coat some, and thin the subsequent coats less, but always use a little brushing liquid. It slows down the drying, and enhances the "wet edge". I put on three coats after the sealer, top and bottom, then got ready to install the whole lot. I'll put on another two coats before I'm done, for a net five. Some people say you need a minimum of seven, but I've never managed it!
 |
| Nice "plum pudding" figure in this Spanish Cedar. |
 |
| The thwart knees are cherry. |
I decided to bed the knees and thwart ends in a slow-cure Sikaflex bedding compound. Its fussy to do, but I carefully taped off all the appropriate surfaces against the mess to come, and was glad I did. Even so, the cleanup was a bitch. The goop is sticky, and the shapes are intricate. But I managed to do it all fairly neatly. I'll have a little touch-up painting to do around all the furniture.
 |
| Sikaflex bedding compound is applied to the parts. |
 |
| The parts and the hull were taped off prior to installation. The squeeze-out is evident here. |
 |
| The finished installation. |
 |
| Another view. |
 |
| The before mentioned dagger trunk cap. |
The fruition of all this work is a beautiful, golden-hued interior, which should look like it just dropped into place, with no evidence of all the labor that went into it. I hope I have succeeded in that regard. But now, thankfully, its time to move on!


Lovely work, Jim. It's funny how the more elegant and careful the work, the less work it looks like when it's done.
ReplyDelete